From Seed to Spice: Grow Your Own Oregano
.webp)
1. What is the most important benefit of onion companion planting?
The primary benefit is pest control. Onions repel a wide variety of pests, including aphids, carrot rust fly, onion flies, and beetles due to their strong sulfur scent. This helps protect nearby vulnerable plants.
2. Can I plant onions with everything in my garden?
No. You should avoid planting onions near legumes like peas and beans. Peas fix nitrogen, but onions can interfere with this process and inhibit the growth of the pea plants. Asparagus is another plant that does not grow well together with onions.
3. Do onions need full sun?
Yes, onions grow best in full sun. However, they can tolerate some partial shade provided by taller companion plants like tomatoes or peppers, especially in very hot climates.
Q: Why is companion planting helps with pest control?
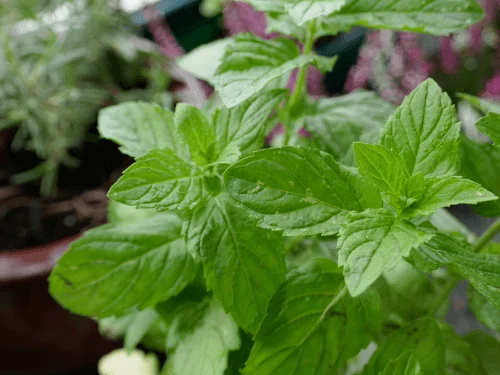
A: Companion planting helps by utilizing the strong scent and diffusive aroma of mint to deter or repel common garden pests like carrot flies, cabbage moths, and ants, which rely on their sense of smell to find host plants.
Q: Is it best to plant mint in a pot or a garden bed?
A: Due to its highly invasive root system, it is almost always best to plant mint in a container. You can plant it in a pot with the bottom removed and then sink that pot into your garden bed; this keeps the runners contained while still allowing the plant to benefit another plant nearby.
Q: What growing conditions does a mint plant prefer?
A: Mint likes moist, fertile, loamy soil and a location with partial shade to full sun. It is a remarkably resilient herb that will thrive as long as its water needs are met.
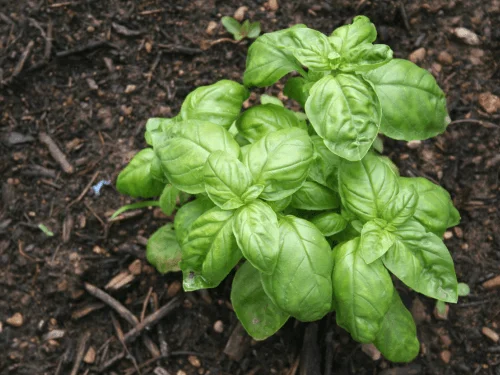
What are the benefits of companion planting with basil?
The benefits of companion planting include improved growth and flavor of basil and providing a natural insect repel system for your garden. Using basil as a companion plant allows it to attract beneficial insects via taste of basil flower nectar, while its strong scent acts to basil repels many common garden pest varieties.
Does basil help ward off specific pests?
Yes, basil in your garden is a powerful tool to insect repel. Basil alongside other aromatic plants can basil to keep aphids and other pests like the tomato hornworm away. Additionally, basil is famous for being one of the plants that repel mosquitoes, making it a great companion plant for patios.
Are there plants I should keep away from basil?
Yes, you should keep cucumber and sage away from basil. Cucumber can attract mildew that might attack basil, while sage prefers much drier soil than a basil plant. Also, keep herbs like basil away from rue, as it can stunt the growth and flavor of basil.
This disclosure clearly states that the content creator may earn a commission if readers make a purchase through the provided links. Learn more
If you're looking for a plant that's low-maintenance, rewarding, and adds a burst of flavor to your cooking, then oregano is the perfect choice. Trust me, if I can grow it, you can too! And who knows, this might be the start of a lifelong love affair with gardening.
Planting Oregano: Timing is Everything
When to Plant Oregano

Where to Plant Oregano
- Sunlight: Oregano loves sunshine! Aim for a spot that gets at least 6-8 hours of direct sunlight per day.
- Soil: Well-draining soil is crucial. If your soil is heavy clay, amend it with compost or sand to improve drainage. Oregano prefers a slightly alkaline soil with a pH of 6.5-7.0.
- Containers: If you have limited space or want to grow oregano indoors, containers are a great option. Choose a pot that's at least 12 inches deep with drainage holes.
- Spacing: Whether planting in the ground or a container, give your oregano plants about 12-18 inches of space to allow them to grow and spread.
Sowing Seeds: A Delicate Touch

Choosing the Right Seeds:
- Varieties: Greek oregano (Origanum vulgare hirtum) is known for its pungent flavor and is a popular choice. Other options include Italian oregano, which has a milder flavor, and sweet marjoram, a close relative with a sweeter taste.
- Sourcing: You can find oregano seeds at garden centers, nurseries, or online retailers.
How to Start Seeds Indoors:
- Containers: Use seed trays, small pots, or biodegradable pots.
- Soil Mix: A seed-starting mix or a well-draining potting mix works well.
- Sowing: Sprinkle seeds thinly over the soil and barely cover them with a light layer of soil.
- Light and Warmth: Place the containers in a warm, sunny location or under grow lights.
- Watering: Keep the soil consistently moist but not soggy.
Direct Sowing Outdoors:
- Prepare the Soil: Loosen the soil and remove any weeds.
- Sow the Seeds: Sprinkle seeds thinly over the soil, barely covering them.
- Water Gently: Use a watering can or spray bottle to avoid disturbing the seeds.
Germination Timelines:
- Oregano seeds usually germinate in 7-14 days, but it can sometimes take up to 3 weeks depending on the variety and environmental conditions.
Growing: Nurturing Your Plants

Watering:
- Frequency: Oregano likes well-draining soil, so avoid overwatering. Water when the top inch of soil feels dry to the touch. Depending on your climate and season, this may be every 2-3 days in the summer and less often in cooler months.
- Best Practices: Water at the base of the plant to avoid wetting the leaves, which can encourage fungal diseases. Watering in the morning allows the foliage to dry before nightfall.
Fertilizing:
- Oregano is a light feeder: It doesn't require heavy fertilization.
- For best results: Feed your oregano once or twice during the growing season (spring and summer) with a balanced, all-purpose fertilizer diluted to half strength. Alternatively, you can use a slow-release fertilizer.
- Container-grown oregano: May need more frequent fertilization due to the limited nutrients in potting mix.
Pruning and Pinching:
- Regular pruning: Encourages bushy growth and prevents the plant from becoming leggy.
- Pinch back the tips: Of new growth regularly to promote branching.
- Remove flower buds: As they appear to keep the plant focused on foliage growth, which is where the flavor is concentrated.
- Avoid harsh pruning: Don't cut back more than one-third of the plant at a time.
Supporting Plants (If Needed):
- If your oregano is getting tall or top-heavy, you can provide support with small stakes or a tomato cage. This helps prevent the stems from breaking.
Harvesting: Flavor at its Peak

When to Harvest:
- Before Flowering: The best time to gather oregano is just before it flowers, as the leaves have the most concentrated flavor at this stage.
- A Regular Schedule: Encourage bushier growth and a continuous supply of fresh leaves.
How to Collect:
- Use clean, sharp scissors or pruners: to cut stems just above a leaf node.
- Don't Overharvest: Leave at least one-third of the plant intact to ensure it continues to grow.
Techniques You Can Use:
- Fresh Use: Simply snip off the amount you need for your recipe.
- Drying: Gather several stems, tie them together, and hang them upside down in a well-ventilated, dark area until dry (about 1-2 weeks). Once dry, crumble the leaves and store them in an airtight container.
- Freezing: Wash and dry oregano sprigs, remove the leaves, and place them in a freezer-safe bag. You can also freeze chopped oregano in ice cube trays with a bit of water or olive oil for easy use in cooking.
Oregano Care and Maintenance

Overwintering (In Cold Climates):
- Bring Potted Oregano Indoors: If you live in a region with freezing winters, bring your potted oregano indoors before the first frost.
- Protect Outdoor Plants: Mulch around the base of outdoor oregano plants to help insulate the roots.
Dividing and Transplanting:
- Mature plants (3-4 years old): Can be divided in spring or fall to maintain vigor and prevent overcrowding.
- To divide: Dig up the plant, carefully separate the roots, and replant the divisions.
General Care Tips:
- Weeding: Keep the area around your oregano plants free of weeds.
- Watch for Pests and Diseases: Regularly inspect your plants for signs of trouble and take action promptly.
Common Pests and Diseases

Pests:
- Aphids: Tiny, sap-sucking insects that can weaken plants.
- Spider Mites: Tiny arachnids that cause leaves to turn yellow and dry out.
- Whiteflies: Small, winged insects that can transmit diseases.
Diseases:
- Root Rot: Caused by overwatering or poorly draining soil.
- Powdery Mildew: A fungal disease that appears as a white powdery coating on leaves.
Organic and Natural Solutions:
- Insecticidal Soap: Effective against aphids, spider mites, and whiteflies.
- Neem Oil: A natural insecticide and fungicide.
- Baking Soda Spray: Can help control powdery mildew.
- Encourage Beneficial Insects: Ladybugs and lacewings are natural predators of aphids and other pests.
Storing Oregano: Extending the Bounty

Drying Oregano:
- Harvest: Cut stems just before flowering.
- Bundle: Tie stems together and hang them upside down in a well-ventilated, dark area.
- Store: Once dry (leaves crumble easily), strip the leaves from the stems and store in an airtight container in a cool, dark place.
Freezing Oregano:
- Wash and Dry: Thoroughly clean and dry oregano sprigs.
- Remove Leaves: Strip the leaves from the stems.
- Freeze: Place leaves in a freezer-safe bag and squeeze out excess air. Alternatively, freeze chopped oregano in ice cube trays with a bit of water or oil.
Other Preservation Methods:
- Oregano-Infused Oil: Combine dried oregano and olive oil in a jar and let it sit for a few weeks.
- Oregano Vinegar: Add a few sprigs of fresh oregano to a bottle of vinegar.
Frequently Asked Questions
Q: How easy is it to grow oregano from seed?
A: Oregano is generally easy to grow from seed, even for beginners. With the right conditions and care, your oregano seeds will germinate and thrive.
Q: Can I grow oregano indoors if I don't have outdoor space?
A: Yes, oregano can be grown indoors successfully. Ensure your plant receives plenty of sunlight (at least 6 hours a day) and is planted in well-draining soil or compost. Consider starting your seeds indoors before transplanting them to small pots for indoor growing.
Q: What are the best oregano varieties to grow from seed?
A: There are many varieties of oregano you can grow from seed. Popular choices include Greek oregano, known for its pungent flavor, and Italian oregano, which has a milder taste. You can also try other varieties like sweet marjoram, a close relative of oregano with a sweeter flavor.
Q: When is the best time to harvest oregano leaves?
A: You can collect oregano leaves throughout the growing season, but the best time is just before the oregano flowers. This is when the leaves have the strongest flavor. To gather, cut the stems back to about 4 to 6 inches tall, leaving some new growth to continue producing leaves.


